
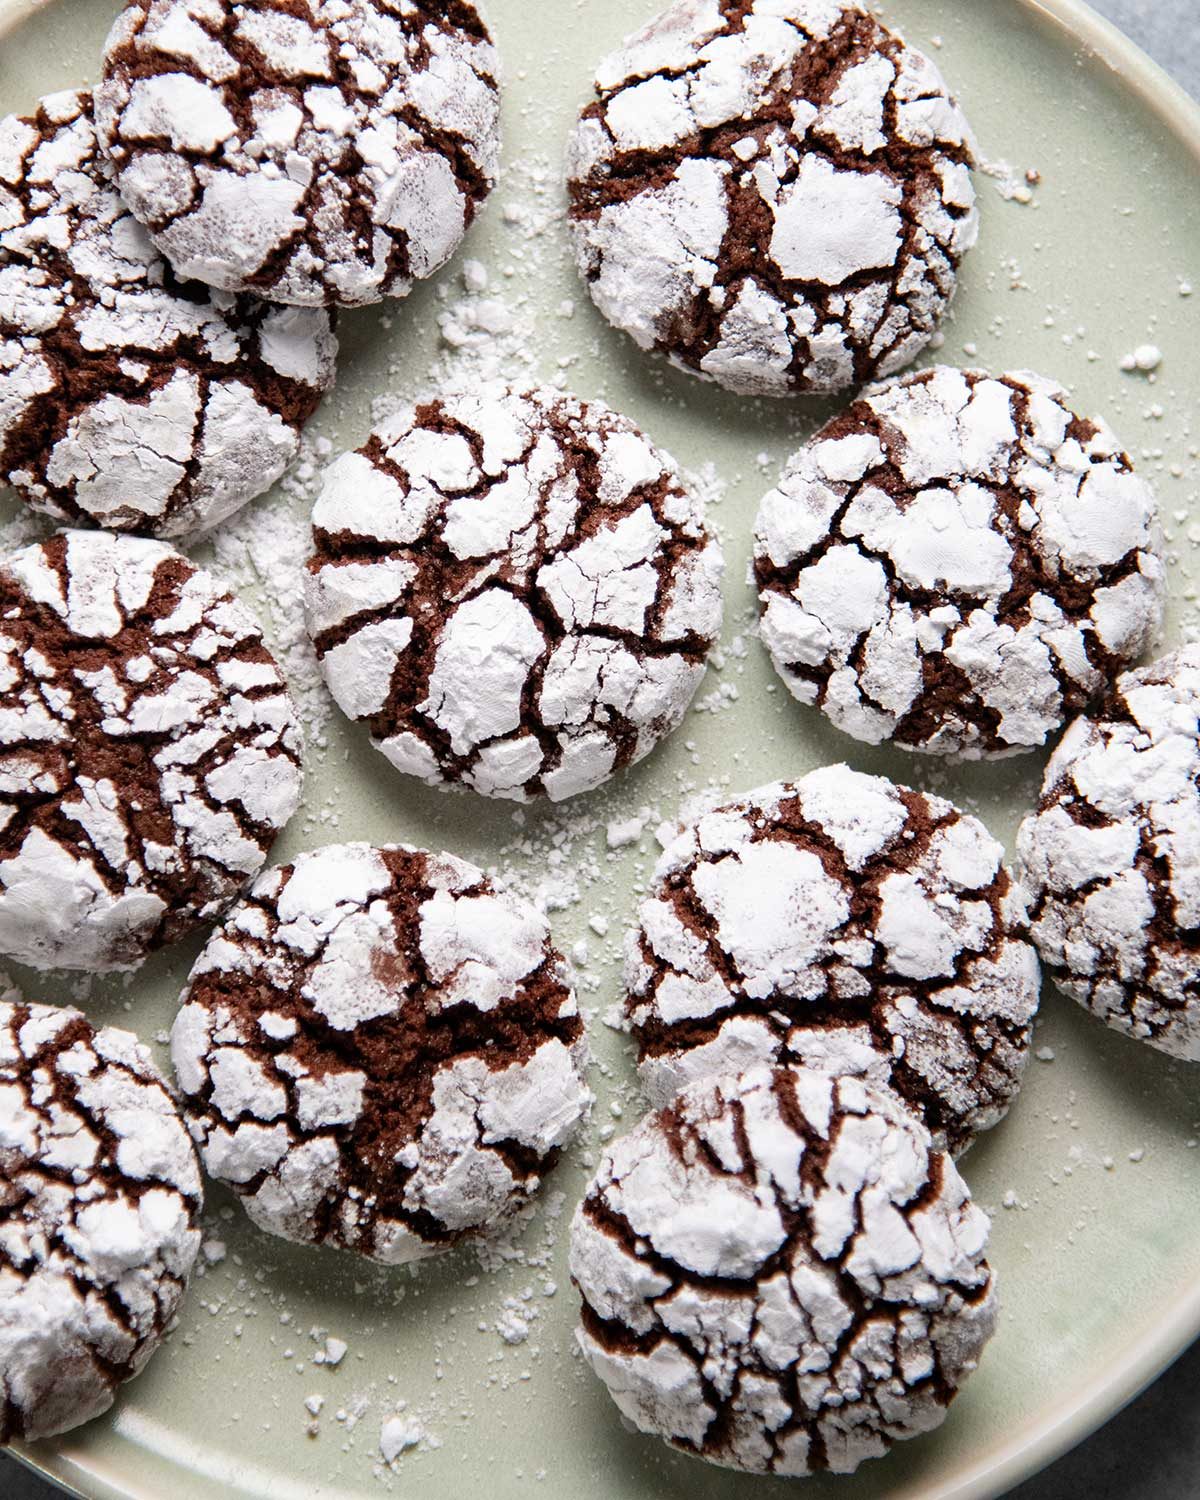
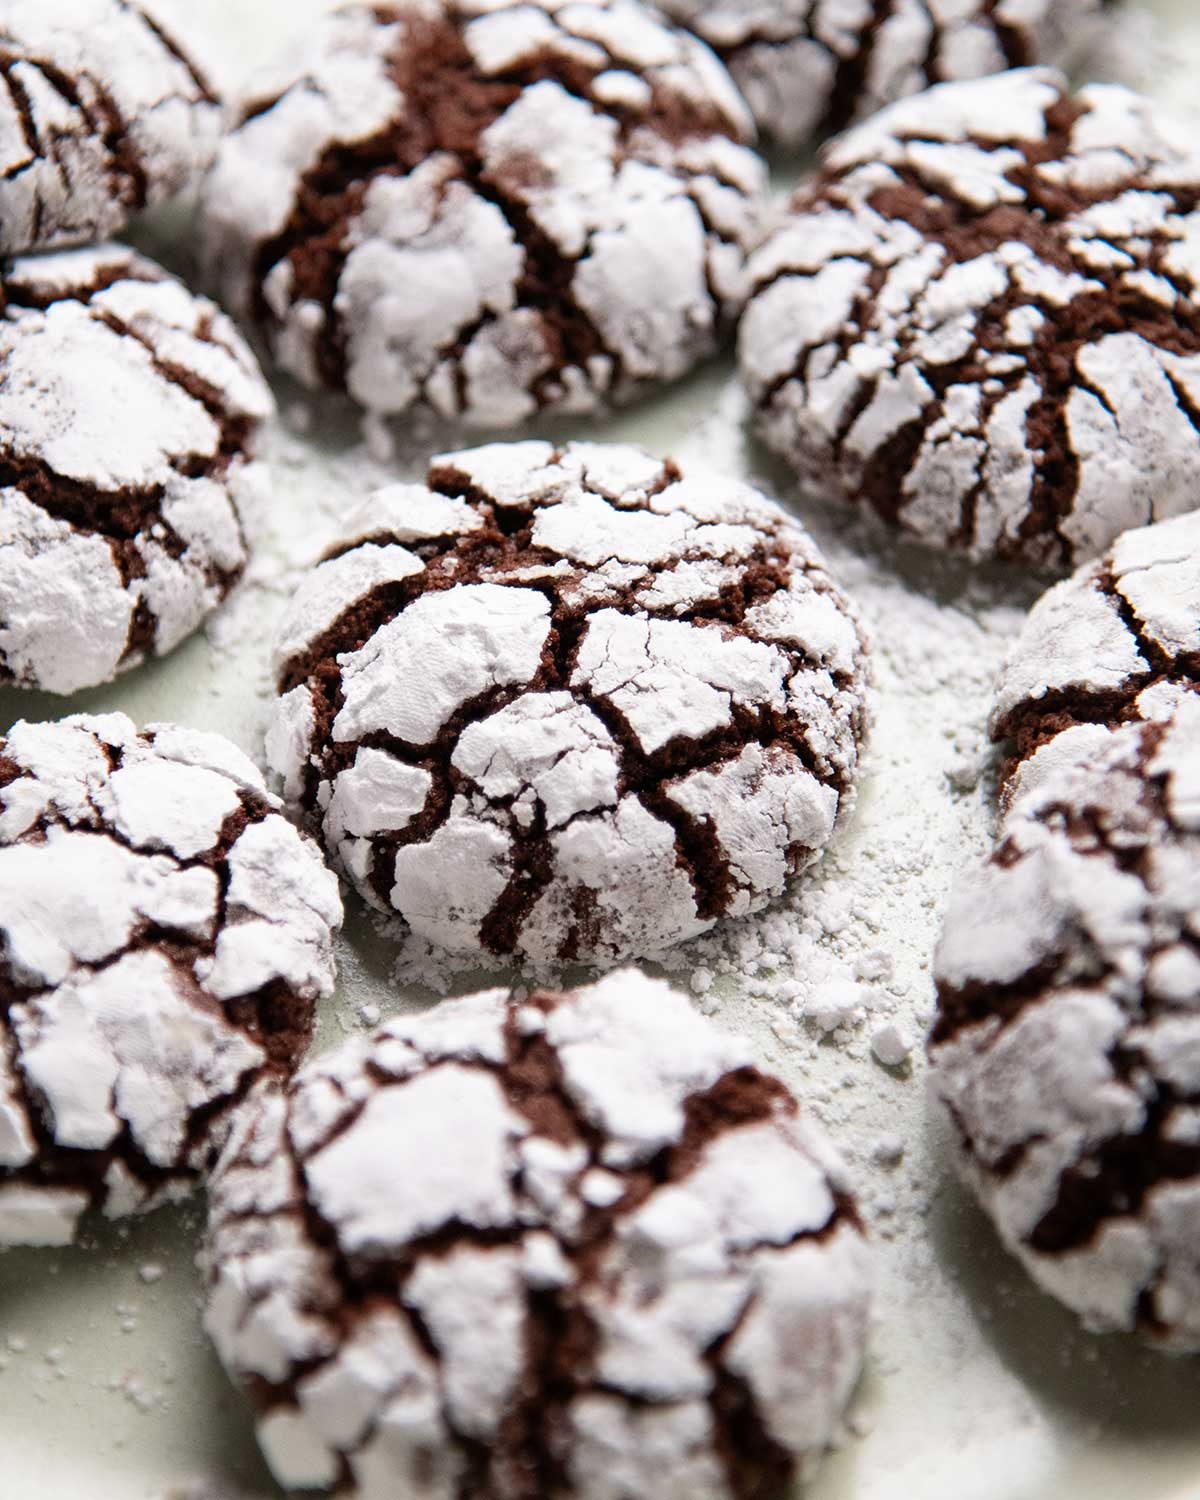
Crinkle Cookies have many names – Earthquake Cookies, Snow Capped Biscuits, Chocolate Crackle Bickies – but they’re instantly recognisable! They taste like a fudgy, chewy brownie inside a crisp meringue shell. Holiday cookie favourite!
Crinkle Cookies
I’m just going to put this right upfront to clearly set the expectation of these Crinkle Cookies – this is not your typical recipe. Most use a cookie dough made with oil and only use cocoa powder for chocolate flavour.
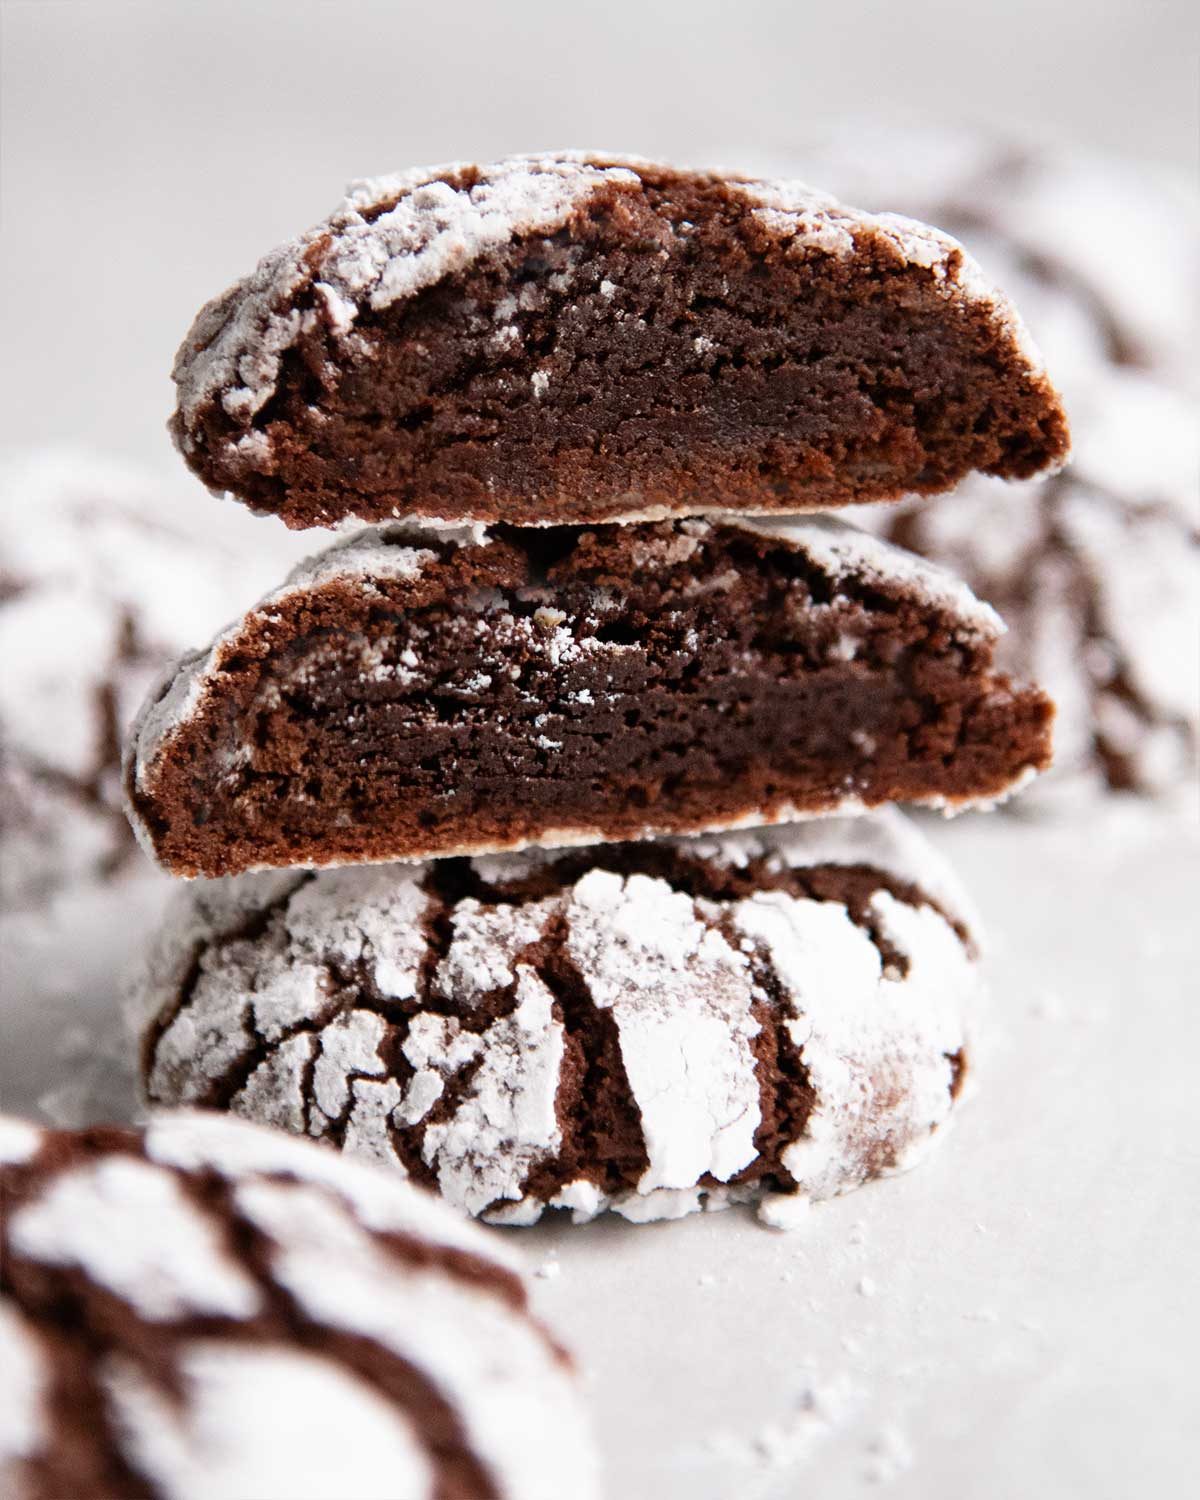
My Crinkle Cookies are made using what is essentially a brownie batter disguised as a cookie, full of all the goodness that is butter and melted chocolate. I add extra flour to turn it into a cookie, baking powder to make it poof up into thick domes and create impressive cracks, and reduce the butter so the cookie isn’t too oily which would absorb the all-important white icing sugar coating.
The result is a Crinkle Cookie that has a very fudgy brownie-like texture with a really chocolatey flavour, in a way you can never achieve with just cocoa powder alone. Yes it’s decadent! But if there’s ever a time for indulgence, it’s the holidays – and Crinkle Cookies are a classic holiday cookie favourite!
Ingredients in Chocolate Crinkle Cookies
Here’s what you need to make these extra chocolatey Crinkle Cookies. Essentially everything you need for fudgy brownies, plus icing sugar for coating!
For the cookie dough
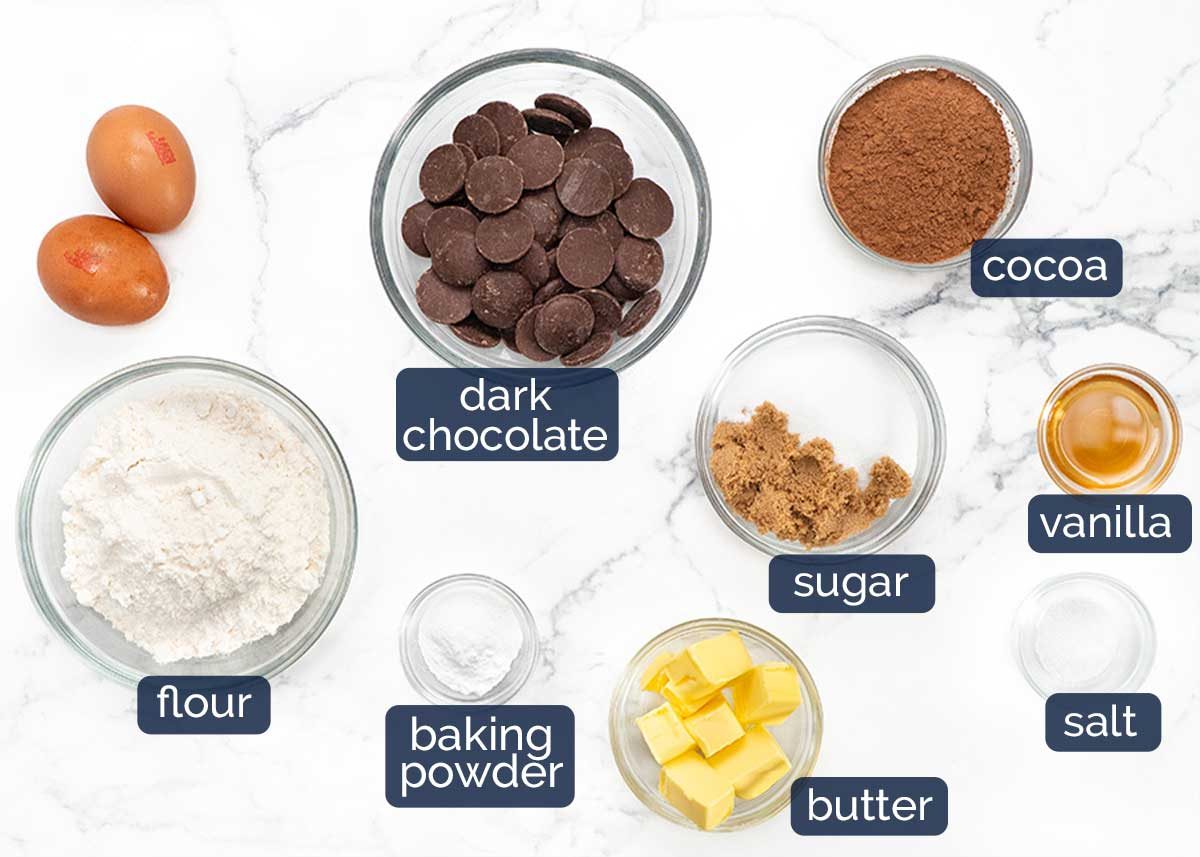
Dark chocolate (US: semi-sweet chocolate) – Don’t be tempted to fancy up these cookies with a higher % cocoa chocolate like 70% cocoa / bittersweet chocolate as it will mess with the fudgy texture. A costly lesson I learned last year when I tried to make a more luxurious version for Christmas gifting and ended up ruining the whole batch instead!
You can use melts (wafers/discs), chips or chop up a block. Just be sure to use chocolate from the baking aisle, not from the confectionary aisle which is not designed for cooking.
Cocoa powder – Use regular unsweetened cocoa powder. As with the chocolate, don’t be tempted to upgrade by using dutch processed cocoa powder which has a more intense chocolate flavour – it is more absorbent and will make the cookie less fudgy inside.
White and brown sugar for the cookie dough – All other things being equal, brown sugar makes cookies more chewy and white makes them crispier. For Crinkle Cookies, I want them fudgy-chewy with a crispy shell, so I use both! But it would not be the end of the world to use only one or the other. For the white sugar for the cookie dough, you can use either caster sugar (superfine sugar) or regular white sugar (granulated sugar).
Butter – Unsalted butter which we melt, so no need to bring to room temperature.
Flour – Just plain / all-purpose flour. Don’t use self raising flour as it has the wrong amount of baking powder built in.
Baking powder – This is what makes the cookies poof up into lovely little domes! Make sure yours is still alive if it’s been hiding in the corner of your pantry for months. Also, don’t substitute with baking soda (bi-carbonate) as it behaves differently – it will make the cookies spread more than it rises, plus it’s stronger.
Eggs – Use “large eggs” from cartons labelled as such which are determined by industry standards. They are eggs which are 50 – 55g/2oz each, in shell. You can use eggs slightly smaller but don’t use larger eggs as it might make the dough too wet to roll balls. If you don’t have eggs the right size, crack eggs into a bowl, lightly whisk, then measure out 1/3 cup and use for this recipe.
Vanilla extract – For flavour. Note – vanilla extract is real vanilla, whereas vanilla essence is artificial so the vanilla flavour isn’t as good. In recipes that rely heavily on good vanilla flavour I really recommend using vanilla extract, but for this one, you can get away with vanilla essence (which is cheaper).
Salt – Just a pinch brings out flavours in the cookie.
for the snowy white coating
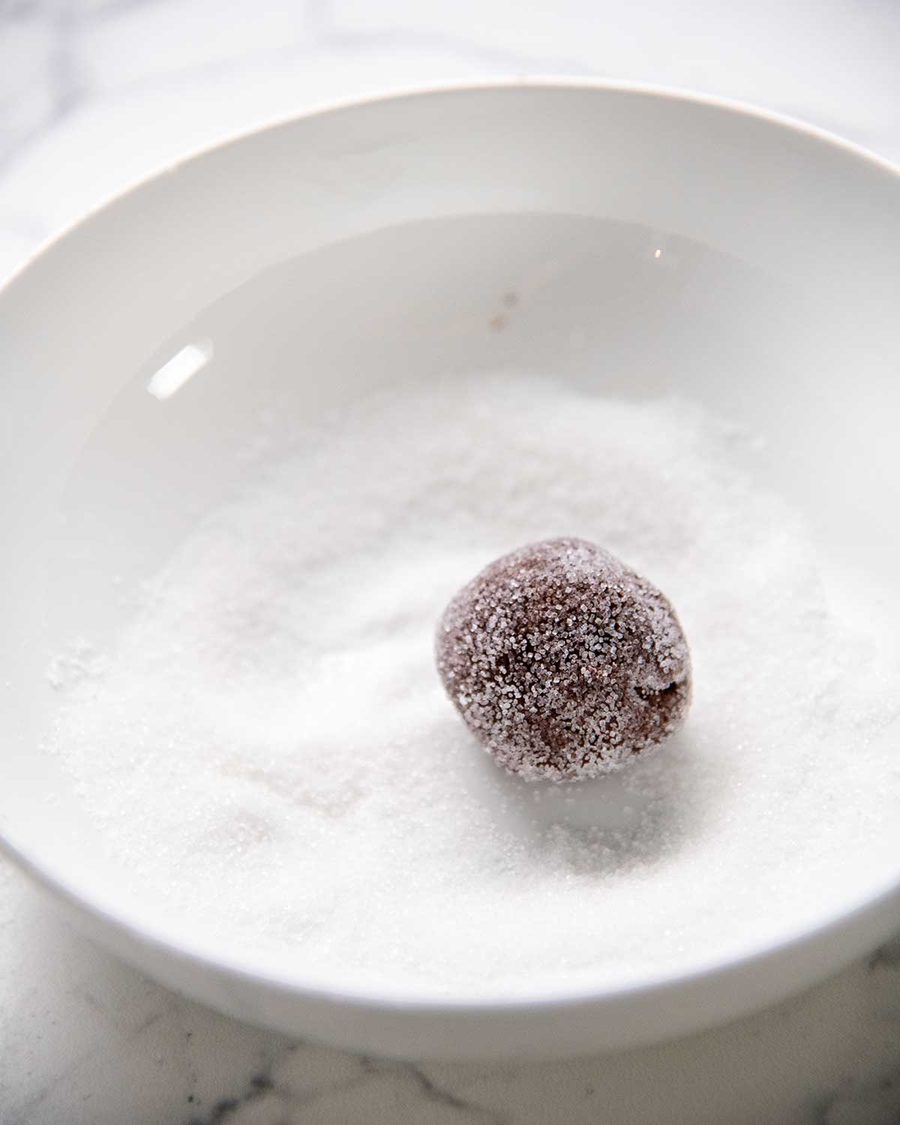
The cookie dough balls are rolled in sugar first before rolling in icing sugar. Brilliant tip from the folks at Cooks’ Illustrated that serves three purposes:
Makes the outside of the cookie crisper by drawing moisture to the surface;
This also creates more impressive cracks; and
Keeps the icing sugar white rather than patchy or translucent. It does this by creating a barrier for the icing sugar that helps prevent it from absorbing moisture and dissolving or sweating. Pet peeve with Crinkle Cookies!
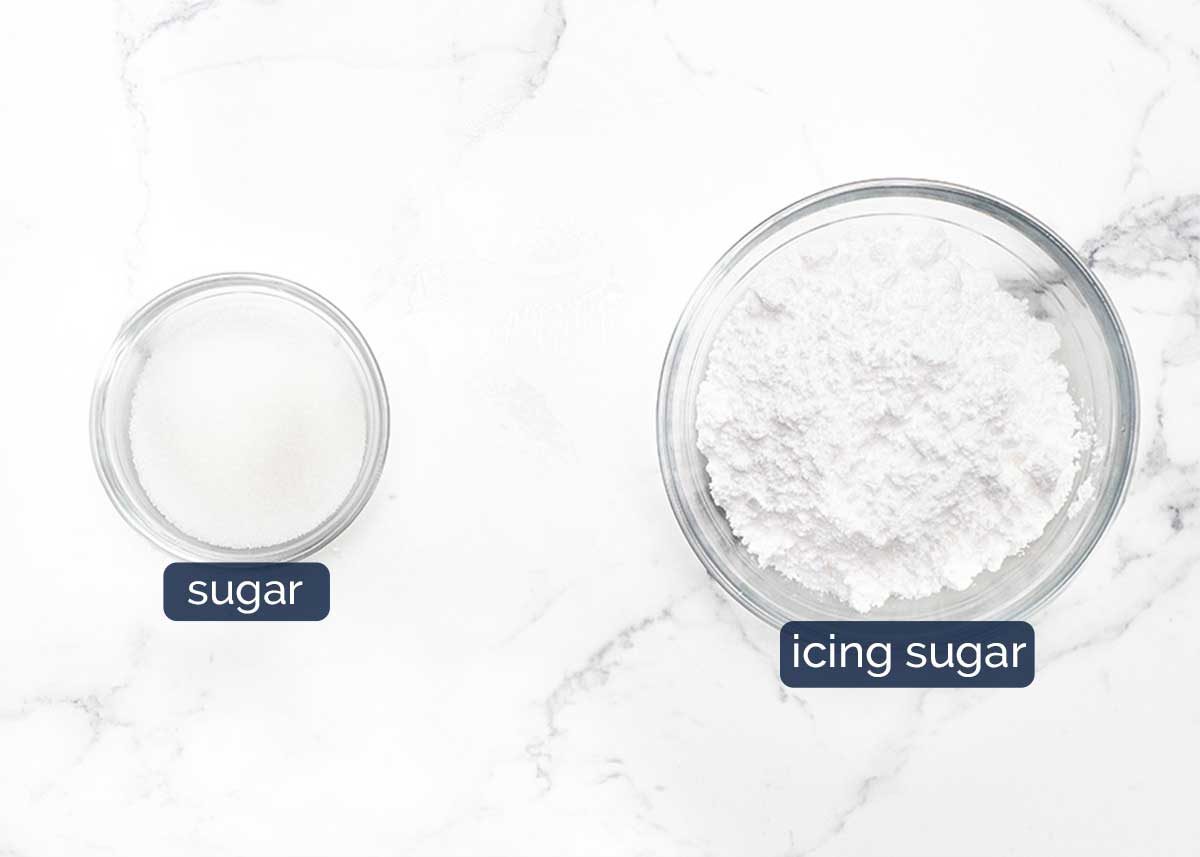
Sugar – Use regular white sugar / granulated sugar, not caster sugar (superfine sugar), which are finer grains and will melt too quickly on the surface of the cookie.
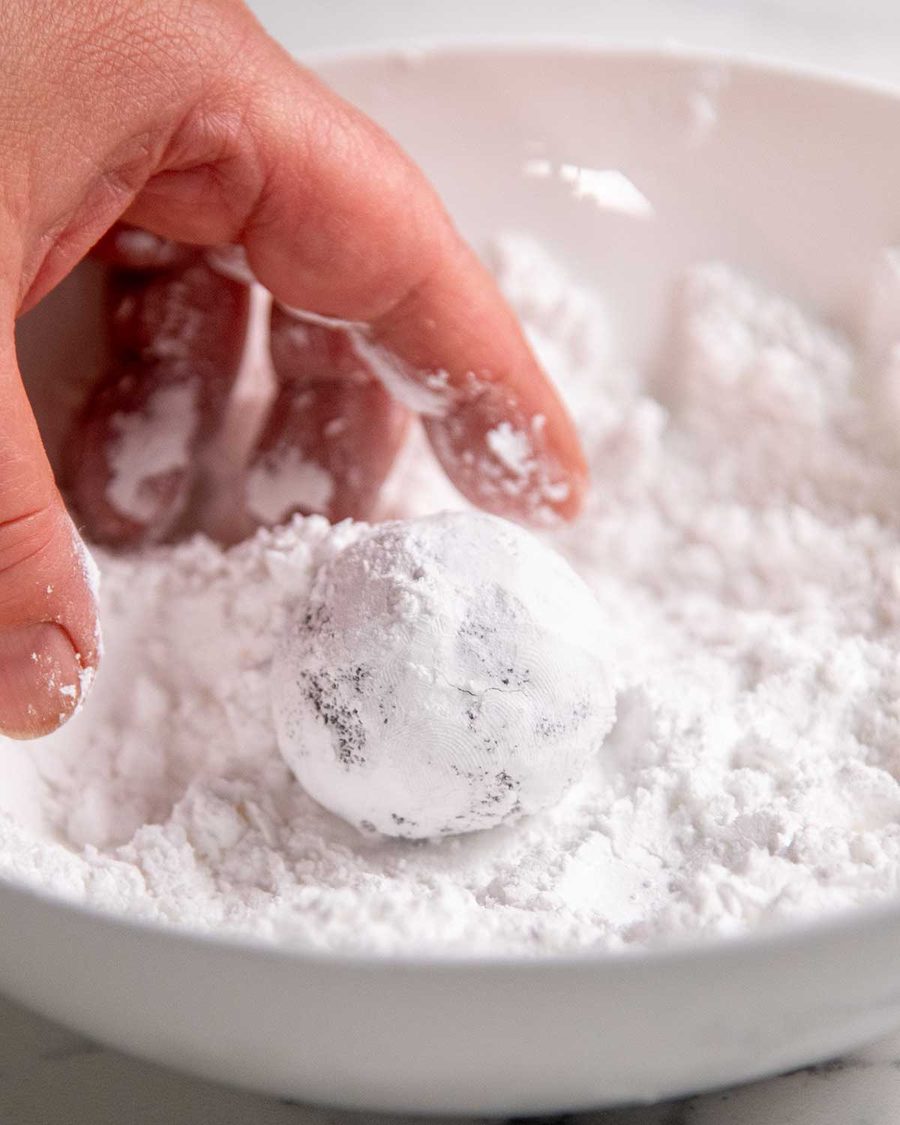
Icing sugar (called powdered sugar in the US) – The snowy white powder on the cookies! There is no need to sift it for ball coating purposes, unless yours has hardened in boulders, then you might want to break it up a bit. 🙂
Note: Australia – use soft icing sugar not pure icing sugar, if presented with the choice. Soft icing sugar contains a little starch to prevent clumping. If you’re outside Australia, you needn’t worry about the distinction as the default icing sugar for mainstream brands should contain the starch. Yes, I am that nerd who intently studies the ingredient label of grocery items in every country she visits – and for those she hasn’t yet visited, she googles madly.
How to make Chocolate Crinkle Cookies
Make sure you pack the icing sugar really thickly on the cookie dough balls. Just when you think you’ve coated them enough, shower it with more then press it on firmly! The goal is to coat them so thickly you practically cannot see any brown cookie dough through the icing sugar. This way, you can ensure your cookies come out with lovely white surfaces rather than translucent patchy surfaces that look like melted muddy snow……
1. Make the cookie dough
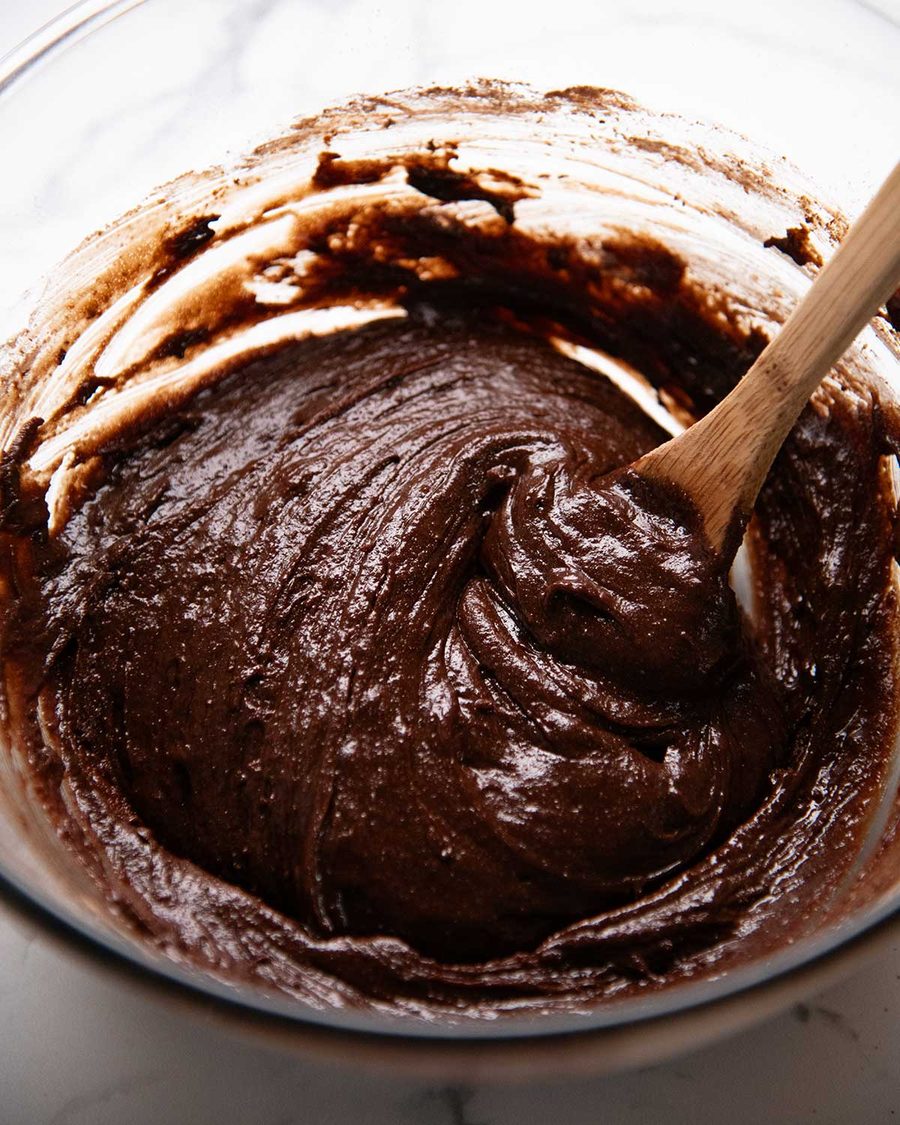
The cookie dough is quite loose when it’s first mixed, but it only takes 30 minutes to firm up enough to roll into balls. You don’t need the dough to be rock hard, just firm enough to handle so you can roll soft balls.
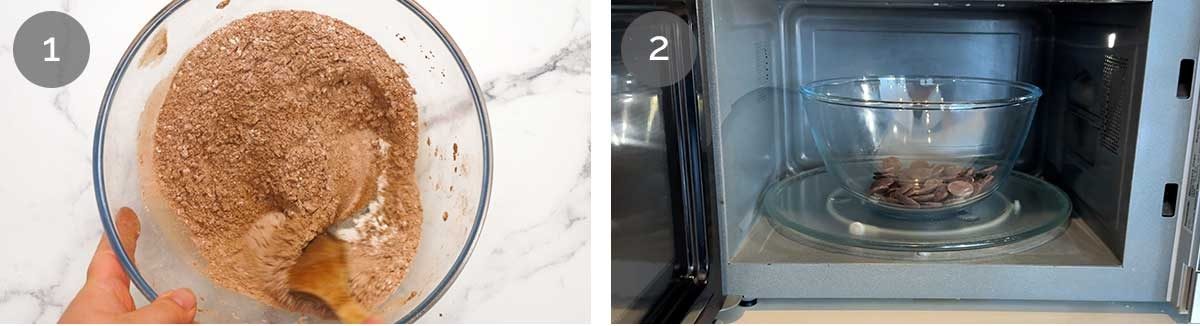
Mix the Dry ingredients in a bowl and set aside (flour, cocoa powder, baking powder and salt).
Melt the chocolate in a large heatproof bowl using the microwave using 20 second increments on high, mixing in between (I use a chopstick – less surface area for the chocolate to get stuck to!). Else, set the bowl over a pot with barely simmering water (don’t let the water touch the bowl). Let the melted chocolate cool for 5 minutes before mixing in the other ingredients.
Whisk wet ingredients – To the chocolate, add the eggs, both sugars, vanilla and melted butter. Whisk well to combine really well.
Make cookie dough – Add the Dry ingredients then use a wooden spoon to mix until you no longer see flour. The batter will be like a thick dollop-y cake batter, have faith! It will firm up quickly. 🙂
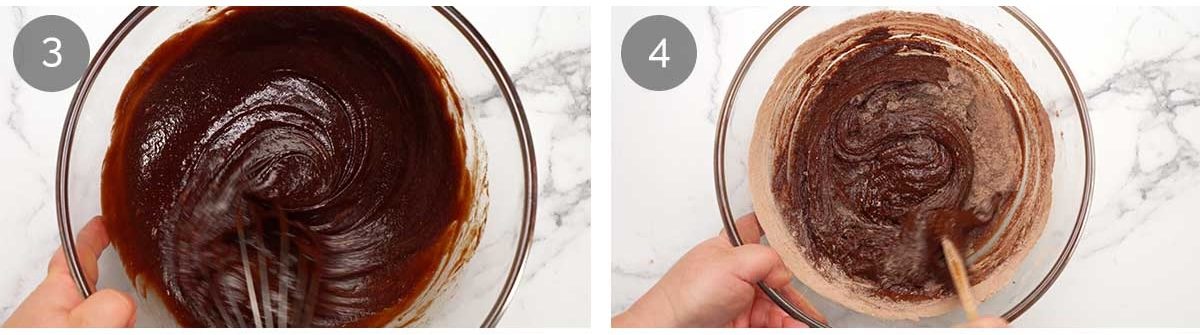
Refrigerate 30 minutes – Put the bowl in the fridge for 30 minutes to firm into a cookie dough so it’s roll-able. If you didn’t let the chocolate cool enough, or if your fridge is really packed or runs a bit warm, it might take longer, but the dough will firm up enough because the melted chocolate will eventually cool down and set.
⚠️ Only refrigerate the dough for as long as required to scoop and roll balls. Don’t try to keep the dough for later to bake as it doesn’t work – the cookie doesn’t spread/crack as it is supposed to, and if it’s a hot humid day then the dough can get sweaty which absorbs the icing sugar. If I figure out a way to keep the dough to bake later, I’ll come back and update.
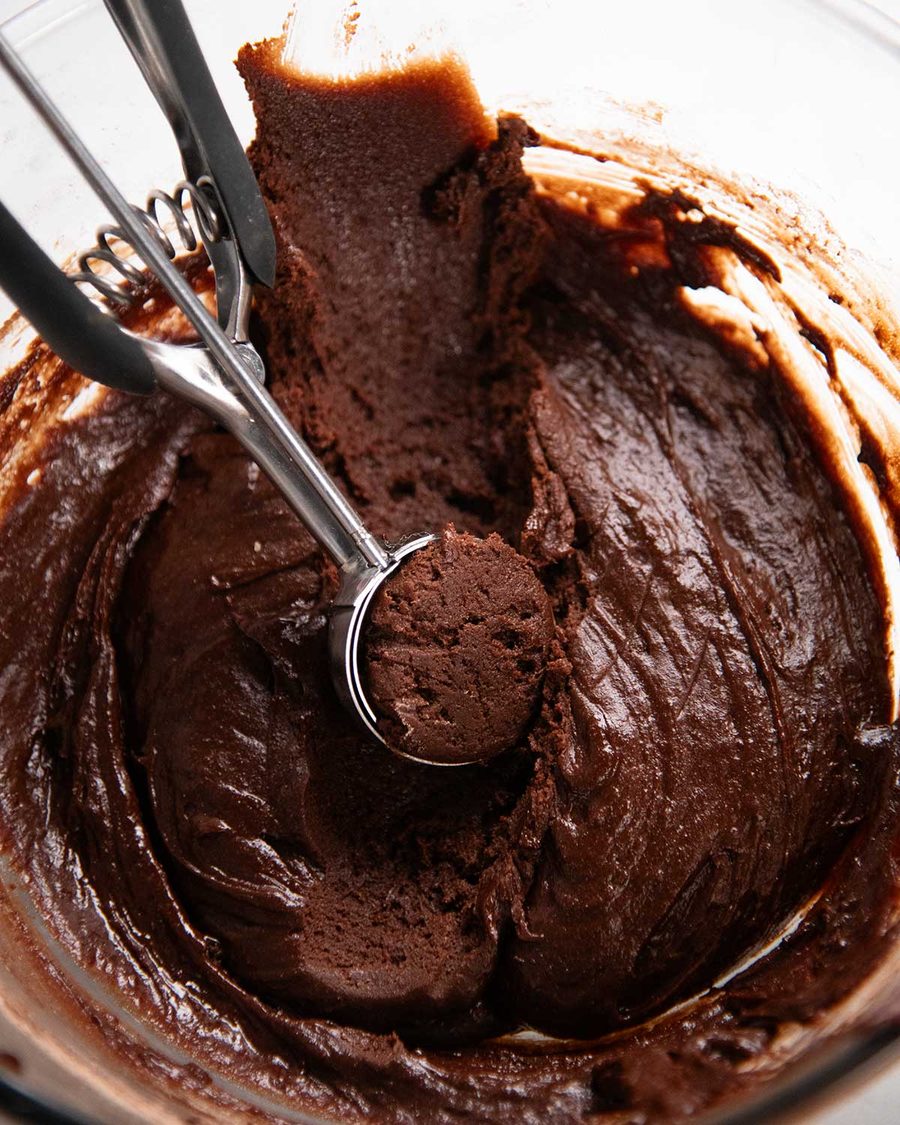
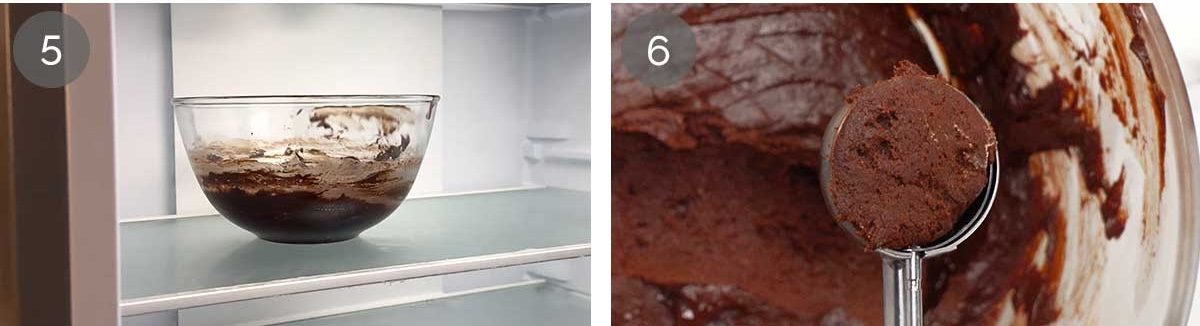
Firmed up dough – After 30 minutes in the fridge, what was a dollop-y batter should have firmed up into a soft cookie dough. It will still be soft but be just firm enough so you can scoop and roll it into balls. The balls will be a bit soft, but manageable. (If the dough is too sticky to roll balls, pop it in the fridge for a bit longer).
2. roll, coat and bake
Only coat the balls just before baking, otherwise the icing sugar will absorb moisture from the dough and disappear, taking that lovely white coating with it!
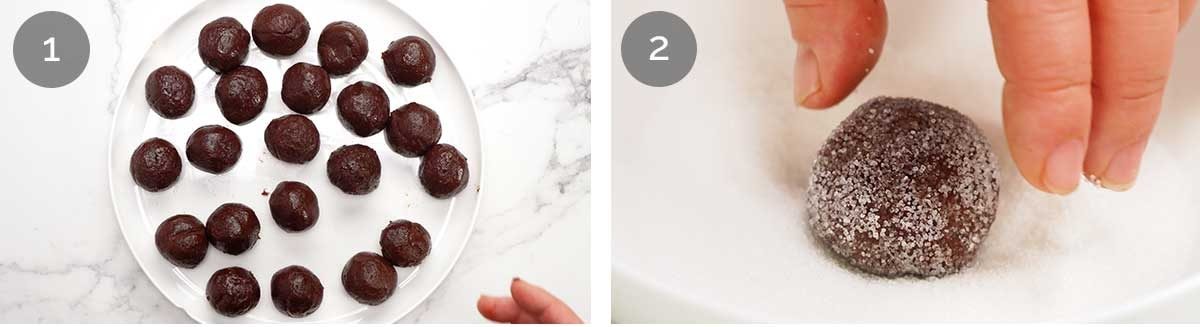
Roll – Scoop out 1 1/2 tablespoons of dough (size 40 cookie scoop) and roll into balls. You should get 20–22 balls.
Light sugar coating – Roll a ball lightly in the white sugar.
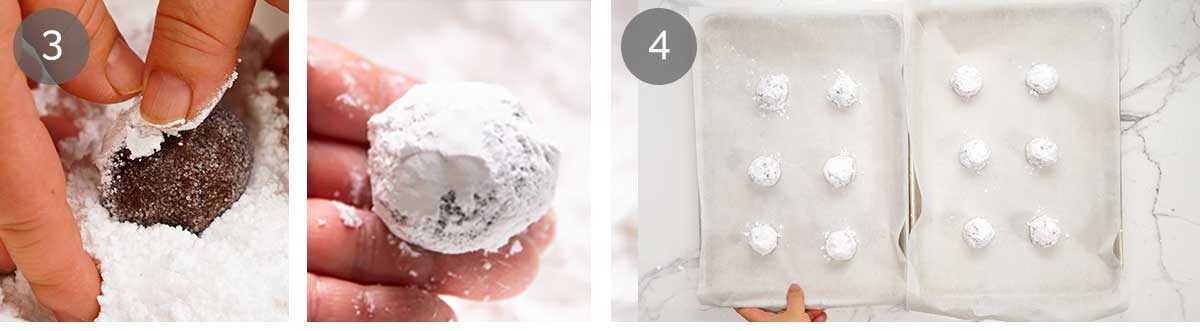
THICK icing sugar coating! Then coat the ball in icing sugar, packing it on thickly until the ball is completely covered with white powder. Aim for full coverage so you can’t see any brown cookie dough! If you only do a light dusting, it will sweat off in the oven so instead of the lovely snow-capped surfaces, you’ll end up with patchy brown cookies that look like muddy snow has melted!
IMPORTANT: Only coat as many balls as you’re baking straight away. Don’t leave icing sugar-coated balls sitting around waiting to be baked, as the icing sugar will absorb moisture from the dough and the lovely white coating will disappear!
Baking trays – Line two baking trays with baking paper / parchment paper. Place the coated balls on the trays at least 7.5cm / 3″ apart, not just to leave room for spreading (they don’t spread much, only double in width) but also for good heat circulation to let the edges crisp up nicely. I put 6 balls on each tray. I could fit more – 8 comfortably, but I still need to do a second bake for the remaining cookies so I just prefer to do less on each tray for more even cooking.
Keep uncoated cookie dough balls in the fridge while you bake the first batch.
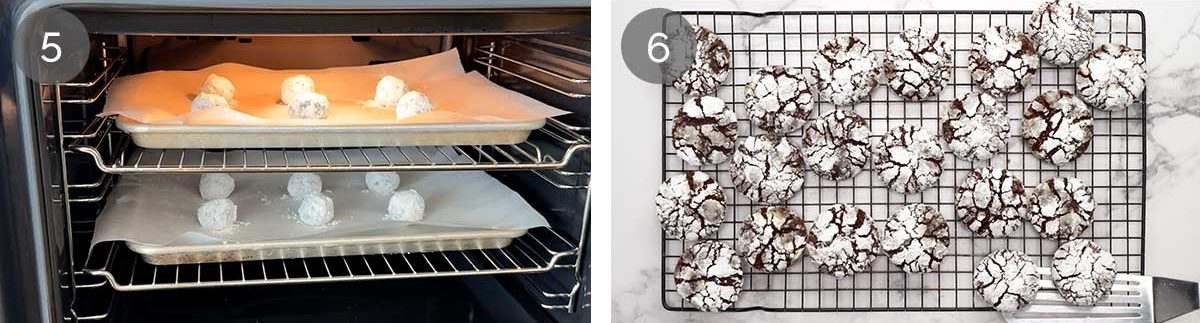
Bake the cookies for 13 minutes at 180°C/350°F (160°C fan-forced). The balls will melt slightly and bake into puffy domes with the “earthquake” cracks. Do not switch the trays or rotate during the bake time as this may deflate the domes, they are very delicate while poofing up and prone to collapsing.
To check if they cookies are done, touch the surface very gently – it should have a thin crusty surface but be jiggly underneath. It will feel so underdone you will be concerned – but please, have faith and trust the process, this is what makes it fudgy!
Cool the cookies on the tray for 5 minutes then use a spatula to transfer them to a rack. Avoid touching the icing sugar as it will come off easily! Let them cool for at least another 5 minutes to set before diving in – the edges and base will set and become crispy, and the inside will firm up so it becomes fudge-like.
Unpopular opinion: they’re even better cold
I know most people like Crinkle Cookies when they are still warm, but I personally prefer them when they are fully cool because they’re even chewier and fudgier. But this requires a full (painful) 30 minutes of waiting time, which of course you know I don’t have the patience for. Instead, I justify the need to try it at various stages of the cooling process “for recipe testing purposes”.
It’s a tough job, but someone has to do it. 🤷🏻♀️
Then after all that “recipe testing”, the few you have left will keep for a whole 5 days. 🎉 As long as it’s not super hot and humid where you are, the snowy white icing on the cookies should last for 3 – 4 days before it starts to fade, thanks to the double sugar coating. Bear in mind if you stack them then you’ll mess it up a bit as the icing sugar gets brushed off and falls into the cracks.
Happy baking! – Nagi x
Crinkle Cookies FAQ
The cracks are slightly larger but the flavour, texture and shape of the cookies are virtually identical. JB says he can taste the faintest fine grittiness in the texture that is inherent with using gluten-free flour, however, I didn’t notice it.
Note: These were tested with White Wings Gluten-Free flour, a brand that is carried by large grocery stores here in Australia. Gluten-free flour blends vary a lot between brands, so I can only vouch for White Wings. However, the fact that it worked so well gives me confidence other good gluten-free flour blends should work too.
Keeps 5 days in an airtight container in the pantry. As long as it’s not super hot and humid where you are, the snowy white icing on the cookies should last for 3 – 4 days before it starts to fade, thanks to the double sugar coating.
I haven’t figured out if it’s possible to make the dough ahead and bake later. The versions I’ve tried so far haven’t worked great, they taste fined but the cookies didn’t spread/crack as they should. Will come back and update if we can figure it out!
Watch how to make it
Hungry for more? Subscribe to my newsletter and follow along on Facebook, Pinterest and Instagram for all of the latest updates.
Chocolate Crinkle Cookies
Ingredients
- 200g/ 6.5oz dark chocolate chips or discs/melts (US: semi-sweet chocolate) – Note 1
- 60g (4 tbsp) unsalted butter , melted and cooled
- 2 large eggs , at room temperature (50 – 55g/2oz each, no larger)
- 1/4 cup white sugar / granulated sugar (or caster sugar / superfine sugar)
- 1/4 cup (tightly packed) brown sugar
- 1 tsp vanilla extract
- 1/4 cup unsweetened cocoa , sifted (not Dutch processed) – Note 1
- 1 cup plain flour / all-purpose flour
- 1 1/2 tsp baking powder (make sure yours is still alive), don’t substitute with baking soda
- 1/8 tsp cooking salt / kosher salt
Dusting:
- 1/4 cup white sugar / granulated sugar (not caster sugar / superfine, it’s too fine)
- 3/4 cup icing sugar / powdered sugar , no need to sift
Instructions
ABBREVIATED RECIPE:
- Melt chocolate, cool 5 min. Add Wet ingredients, whisk well. Stir in Dry ingredients with wooden spoon. Fridge 30 min. Roll 20 – 22 x 1.5 tbsp balls, roll in sugar then pack on icing sugar thickly – only do what fits on the trays. Bake 13 min 180°C/350°F (160°C fan).
FULL RECIPE:
Make cookie dough:
- Mix dry ingredients – Whisk the cocoa powder, flour, baking powder and salt together in a medium bowl. Set aside.
- Melt chocolate – Place the chocolate in a large heatproof bowl. Microwave in 20-second increments, stirring between each, until melted and smooth. Leave to cool for 5 minutes.
- Make cookie dough – Add the butter, eggs, both sugars and vanilla to the melted chocolate. Whisk until thoroughly combined. Add the dry ingredients and mix with a wooden spoon until incorporated. The dough should be very thick but too soft to roll into balls. Refrigerate for 30 minutes to firm up, don't leave it in so long the dough gets hard. (Note 2 for skipping this step.)
Coating and baking:
- Preheat oven to 180°C/350°F (160°C fan-forced). Line 2 baking trays with baking paper/parchment paper.
- Prepare coating – Place the sugar in one shallow bowl and the icing sugar in another. Wider bowls make coating easier.
- Roll balls – Take the dough out of the fridge. It should be firm enough to roll into soft balls (if not, refrigerate a little longer). Scoop out 1 1/2 tablespoons of dough (size 40 cookie scoop) and roll into balls. You should get 20–22 balls.
- Coat – Roll a ball lightly in the sugar, then coat in the icing sugar, packing it on thickly until the ball is completely covered. Aim for full coverage so you can't see cookie dough! Place on a prepared tray. Repeat with enough balls to fill both trays, spacing them 7.5cm/3" apart. (I do 6 per tray for the first batch, then 4 – 5 per tray for the second. Feel free to fit more if you have larger trays and oven.) Keep the remaining uncoated balls in the fridge until needed (don't coat until just before baking, it will sweat off).
- Bake for 13 minutes. The cookies will puff up into domes and be very soft. Don't open the oven or rotate the trays during baking – this can cause the cookies to collapse. The cookies are ready when they have a light crust on the outside but they will still be jiggly inside.
- Cool – Leave the cookies on the trays for 5 minutes to set a bit (the outside goes crispier and the inside will set like fudge). Then carefully transfer to cooling racks using a spatula, cool for another 5 minutes (avoid touching the icing sugar coating with your fingers). Coat and bake remaining dough balls. Most people enjoy these a bit warm. But I like them fully cool because they become chewier and fudgier!
Recipe Notes:
Nutrition Information:
Life of Jaffle
I am delighted to report that Jaffle is fully toilet trained. But I am disappointed to report that his excited-greeting-spray still continues, a problem that starts the moment an excited Jaffle reaches the person in question and continues until the built-in watering system is empty.
So whenever someone Jaffle knows comes around, the routine is to dash out onto the lawn for greetings before being allowed inside the house like a normal visitor. 😆

Unfortunately, JB was a bit too slow with the lawn-greeting-dash this morning…..
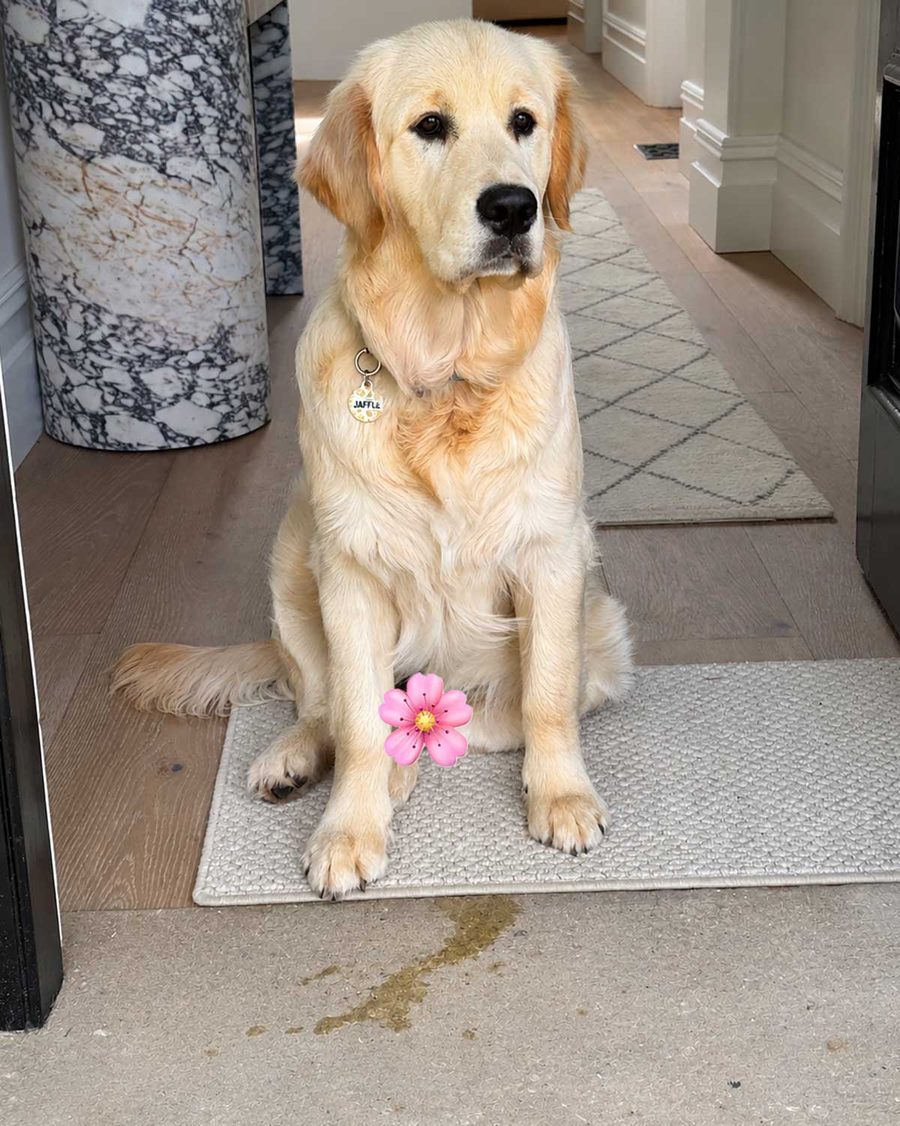
As for the Modesty Flower….well. Mr Jaffle is a teenager in dog years. When he sits, something tends to pop out.
I prefer to keep this place G-rated!
OMG I made these today – decadent and delicious. Easy recipe to follow. Thanks Nagi, Xmas treats sorted.
Can cacao be used as a substitute for coco powder ?
Ahhh the joys of toilet training and dealing with excited water filled greetings. Looks like Jaffle is growing very quickly.
Cookies and dog pee. Yikes
There are some things about your dog that do not be published.
What comes next? Vomit?
Thanks
Methinks you do not have to read what those of us loving the scene understand and smile at . . .
Those things are just part of life.
Just bake and relax. Go to a different website if this normal mentioning offended you. We all have pets. Been through all of it. Find something else to dwell on in your own life.
I am relaxed Moni. And yes, I have and had lots of pets and have been dealing with all aspects of pet ownership including the above problem.
It just would never occur to me to put dog pee issues and pictures out there on a cooking website. I guess it must be acceptable to operate on that level for a lot of people.
I may not be a baker or ardent cookie eater but these brown crunchy-looking offerings look irresistible. Even if I don’t I know more than a few who will exclaim ‘ooh’ 🙂 ! And . . . that popping-out bit, well, that’s a normal part of the boy also . . . oh well, what comment do you expect from a North European born where we all go into the sauna stark-naked and then jump into the nearest lake or river still so . . .
These cookies look delightful! Can they be frozen after baking to get a jump on Christmas baking?
Thank you for your joy, humility, and authenticity, Nagi! You’re my first stop when I need a trustworthy recipe.
That is classic!! We used to have a female black lab that had the same greeting🤣🤣 Jaffle is looking gorgeous ❤️❤️
This is such a great crinkle cookie recipe. Some I’ve tried her on the dry side, but not this one. It was like a moist chewy brownie.
And Jaffle you have been the highlight of my day. I laughed so hard at today’s posting about you. JB I bet you’ll be faster getting out onto that lawn next time. 😂
I can’t seem to able to save the recipes any longer. There’s no little heart showing up. Hope someone can help!!
I have the same problem! All these tasty recipes and I can’t save them in “my recipe tin”.
Nagi please help 🙏
Donna, I jave the same question. I am having a big surgery 4 days before Christmas so I’m attempting to get all of my family’s favorites -as well as the kids birthday cakes (both within 3 weeks after Christmas)- done and in the freezer so that all celebrations can be as “normal” as possible for everyone.
I know Nago said that she hasn’t figured out a way to keep the dough and have them still bake up right, so I’m wondering if prebaking and then freezing may also affect the crispiness of that outside layer which in my opinion is vital.
It’s “so hard” living in these 2026 times where it feels like there should be a work around for everything. Then sometimes science comes along and disagrees. It’s just so RUDE 🤣.
Unbelievably delicious and beautiful! I wanted to freeze them but they’d gone before I found a box to put them in. I’d like to send you a photo!
They look like a lovely addition to a gift tin of cookies.
Can the cookies be frozen? I don’t think you mentioned this.
Add a splash of rum. It’s Christmas after all.
Where I am from, this is called a Brookie! I’m definitely going to have a go at your version today – I am practising for my holiday baking packages… Your Caramel Slice is always one of the highlights! (And is the recipe that led me to you lol)
Nagi, I just want to thank you so much because you do not inundate us with ads. You are the only site I visit because there is a barrage of ads and can’t get a recipe . There is a peace on your site that is not found in others. Thank you for thinking about your readers!
I would like to make these with gluten-free flour (Bob’s Red Mill 1 to 1). How many grams of flour
Thanks for another amazing recipe! So fudgy and delicious.
Thank you Nagi !!! I immediately shared the recipe with my daughter-in-law in Switzerland ! I know 2 young kids who will love making and… devouring them ! Thank you for sharing Jaffle’s everyday life, you are so good at writing, a real delight to read you !
Poor Jaffle. Ah, the inglorious days of learning to control all these body parts and functions. They should just call them Puppees!
These cookies are great for the holidays…or anytime!
For entertaining at holiday time, I will wrap the dough around a marachino cherry for a sweet surprise. I have also pressed a cordial cherry or brandy cordial into the top of each cookie after cooling them a few minutes so they aren’t super hot. Just make sure to use the non-alcohol cordials around the kiddos!
This really elevates a cookie into something worthy of being served after dinner on its own plate!
Defs giving these a Christmas potential go.